Revolutionize Your Productivity:
Step-by-Step Guide to Building a Custom ChatGPT for Task Management with Zapier, Notion, and Beyond

In this guide, you'll discover how simple it is to build a custom ChatGPT that integrates with Zapier and Notion to automate your task management. This setup is just the beginning—you can apply similar techniques to automate many other business processes, such as calendar updates, generating and emailing proposals, and more.
Introduction
I embarked on this experiment to explore the possibilities of connecting ChatGPT with other applications. The moment I realized ChatGPT could integrate with Zapier, I was thrilled, knowing Zapier connects with over 5,000 third-party apps. Given that I use Notion to organize my life, it seemed like the perfect proof-of-concept to create an integration that allows me to add new tasks easily, even using voice commands through the ChatGPT mobile app.
Setup
To start, you'll need the following accounts and tools:
- A paid ChatGPT account.
- A Notion account: Sign up here.
- Notion Database: Create a Notion database to hold your tasks. For detailed instructions, check out my blog post on building a Notion organization system.
- A Zapier account: Sign up here.
-
Connect accounts on Zapier: Go to the connections page and add ChatGPT and Notion.
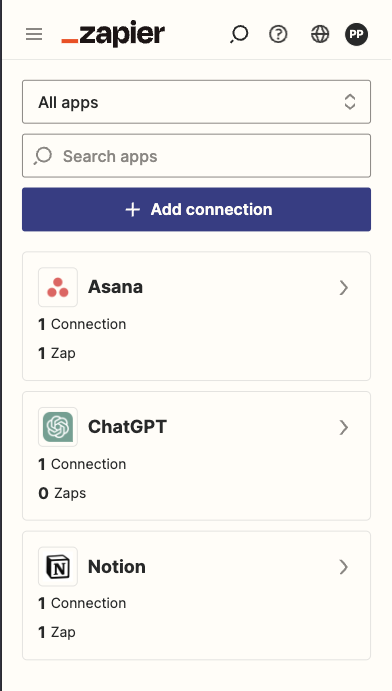
That should cover the necessary setup. Now, let's dive into the step-by-step guide to building a custom ChatGPT for task management with Zapier and Notion.
Creating a Custom ChatGPT
What is a Custom ChatGPT?
A custom GPT is a specialized version of ChatGPT with preset instructions and additional context based on the information you provide. For example, you can create a customer support GPT by uploading FAQs. It can also start conversations with predefined prompts, like “Get my latest tasks and help identify the most important ones.”
In my opinion, the most powerful feature is the ability to run Actions, allowing the GPT to interact with external APIs, opening up vast possibilities for richer contextual conversations and storing useful data.
Steps to Create a Custom ChatGPT
-
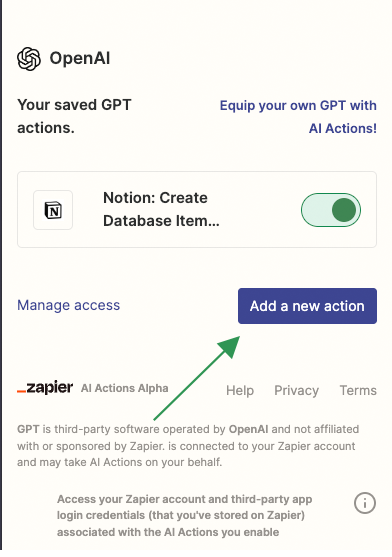
On the Zapier actions site, go to ChatGPT Zapier Actions to make the connection and create the action. If Zapier is connected with ChatGPT, you should have an option to create a new action. Copy the action name for later use.
- Go to the ChatGPT site and log in.
-
Select
Explore GPTsfrom the menu. On the explore page click (+ Create) on the upper right-hand side of the screen.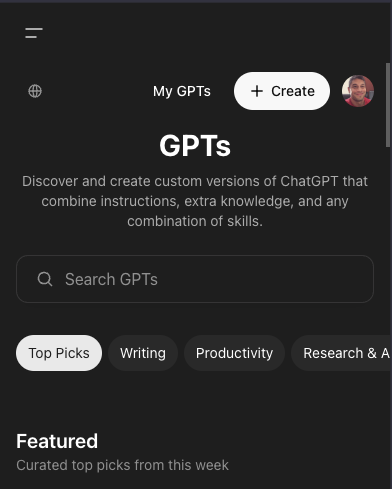
- In the
New GPTwindow, you'll see Create, Configure, or Preview sections. Starting with Create can be helpful, since the GTP builder will help you generate some of the configuration properties. I encourage you to experiment a bit with that, since it provides some good guidance on setting it up. But, for the purposes of addind this automation, you will need to go to configure it manually in theConfiguresection.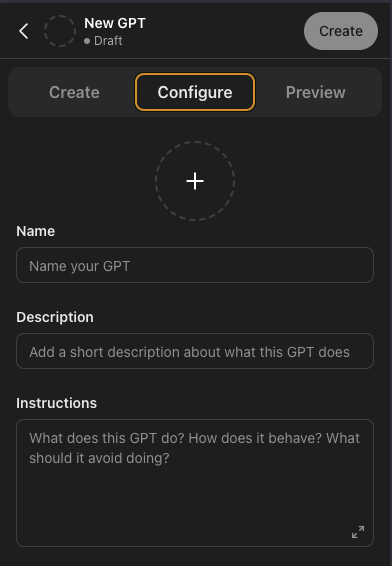
- Fill out the properties:
- Name:
Your custom GPT name. - Description:
This is a description for mainly for other users. -
Instructions:
These are the detailed natural language instructions for the GPT. For example, you could write:You are an assistant for managing tasks in Notion. Your goal is to help users efficiently create new tasks in Notion. You should provide clear and actionable guidance for task creation and assist with automating this process using Zapier's AI actions to enhance productivity.
Below that set of instructions, add Zapier’s canned instructions for communication. More details can be found on Zapier’s actions site: Zapier GPT Actions.This is what I used:
### Rules: - Before running any Actions, tell the user that they need to reply after the Action completes to continue. - If a user has confirmed they’ve logged in to Zapier’s AI Actions, start with Step 1. ### Instructions for Zapier Custom Action: Step 1. Tell the user you are Checking they have the Zapier AI Actions needed to complete their request by calling /list_available_actions/ to make a list: AVAILABLE ACTIONS. Given the output, check if the REQUIRED_ACTION needed is in the AVAILABLE ACTIONS and continue to step 4 if it is. If not, continue to step 2. Step 2. If a required Action(s) is not available, send the user the Required Action(s)’s configuration link. Tell them to let you know when they’ve enabled the Zapier AI Action. Step 3. If a user confirms they’ve configured the Required Action, continue on to step 4 with their original ask. Step 4. Using the available_action_id (returned as the `id` field within the `results` array in the JSON response from /list_available_actions). Fill in the strings needed for the run_action operation. Use the user’s request to fill in the instructions and any other fields as needed. REQUIRED_ACTIONS: - Action: {{NAME_OF_ZAPIER_ACTION}} - Conversation Starters:
Add pre-canned conversation starters to help users get started. An example starter could be “Get my latest tasks and help identify which are the most important ones, please.“ or "Generate a chart of all my sales reps who may have too much on their plate.” - Knowledge:
Upload files that provide additional context to all the chats. -
Capabilities:
- Web Browsing: (Required for this automation)
- DALL·E Image Generation
- Code Interpreter & Data Analysis
Configuring the Action in ChatGPT
- Click on the Create new action button at the bottom of the properties page.
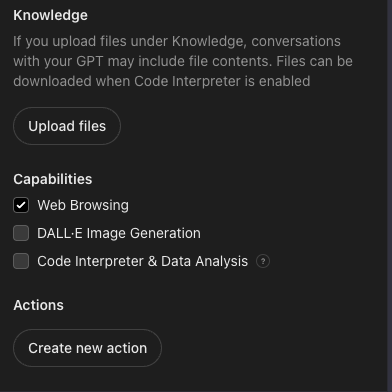
- Setup authentication method: Zapier uses Oauth.
- Schema: This is a place to enter the OpenAPI schema from the API for your action. Zapier has this published so you can use the “Import from URL” feature and use this URL:
https://actions.zapier.com/gpt/api/v1/dynamic/openapi.json?tools=meta - After the available actions have populated, click on Test. This will have the GPT communicate with Zapier to ensure everything is set up correctly and log you in.

Once you get a success message, then go back to the Preview window and try out the GPT end-to-end!
That's it! You have now created a custom ChatGPT that can interact with Zapier and Notion.
Automation Ideas
This setup is just the beginning. You can apply similar techniques to automate many other business processes, such as:
- Task Creation:
We've done this for Notion, but this can also be used for Asana, or Trello based on conversations or emails. - Lead Capture:
Automatically capture lead information from chats and add them to a CRM like Salesforce or HubSpot. - Meeting Scheduling:
Schedule meetings in Google Calendar or Outlook based on availability and preferences discussed in chat. - Campaign Management:
Create and manage marketing campaigns in tools like Mailchimp or ActiveCampaign based on chat interactions. - Inventory Management:
Automate order processing and status updates through e-commerce platforms like Shopify or WooCommerce. - Custom Workflows: Create custom workflows for repetitive tasks such as data entry, file uploads, or notifications based on specific triggers in chat.
Conclusion
As you can imagine, the possibilities are endless. By combining ChatGPT with Zapier and other tools, you can create a powerful automation system that streamlines your workflow and boosts productivity.
I hope this guide has inspired you to explore the potential of custom ChatGPTs and automation. If you have any questions or need help setting up your custom ChatGPT, feel free to reach out to me. I’d love to hear about your projects and help you get started.
Happy coding and automating!
